Skip to: Why grow from seed? // The steps to grow from seed // Flower development // Compatibility // Pollination // Seed development // Germination and planting // Conclusions // References
When I made my first attempts to collect and grow seeds from my tradescantia houseplants, I had pretty much no information to go on. There is very little published work about cultivating tropical tradescantias from seed. I wasn’t totally sure it would work at all, and I had to make it up as I went along.
I’m not an expert now, I’m still learning (by continuing to make it up as I go along). But I have successfully gone through the process from flower to seed to seedling, with several different species. And now I know how the steps work, I’m documenting them so that other people don’t have to figure it out from scratch every time.
Why grow from seed?
Honestly? There’s not that much reason to. It’s laborious, slow, often disheartening, and unlikely to produce anything particularly dramatic. It’s certainly not the most efficient way to make more plants, considering how easy tradescantias are to propagate from cuttings.
But the real benefit of growing from seed is that you can absolutely guarantee that every single seedling will have its own completely unique and brand new genetics. It will be different from any other tradescantia that has ever existed.
That doesn’t necessarily mean it will look different. Although it might! And it also doesn’t necessaily mean it will have any improved traits. Although it could!
Essentially, growing from seed is a roll of the dice. Rather than getting exactly the same plant over and over, you have no idea what you’ll get. It could be a weak, sickly mutation that never makes it to adulthood. It could be a seedling that grows up to be essentially indistinguishable from one of its parents. Or it could be a remarkable new mutation with better vigour, larger flowers, or more dramatic leaf colour than any before it.
If you just want to make lots of plants that you know will be easy and consistent, there’s probably no reason to consider growing from seed. But if you like the idea of gambling on an interesting outcome – and you’re okay with some tedium and setbacks – then it can be great fun.
The steps to grow from seed
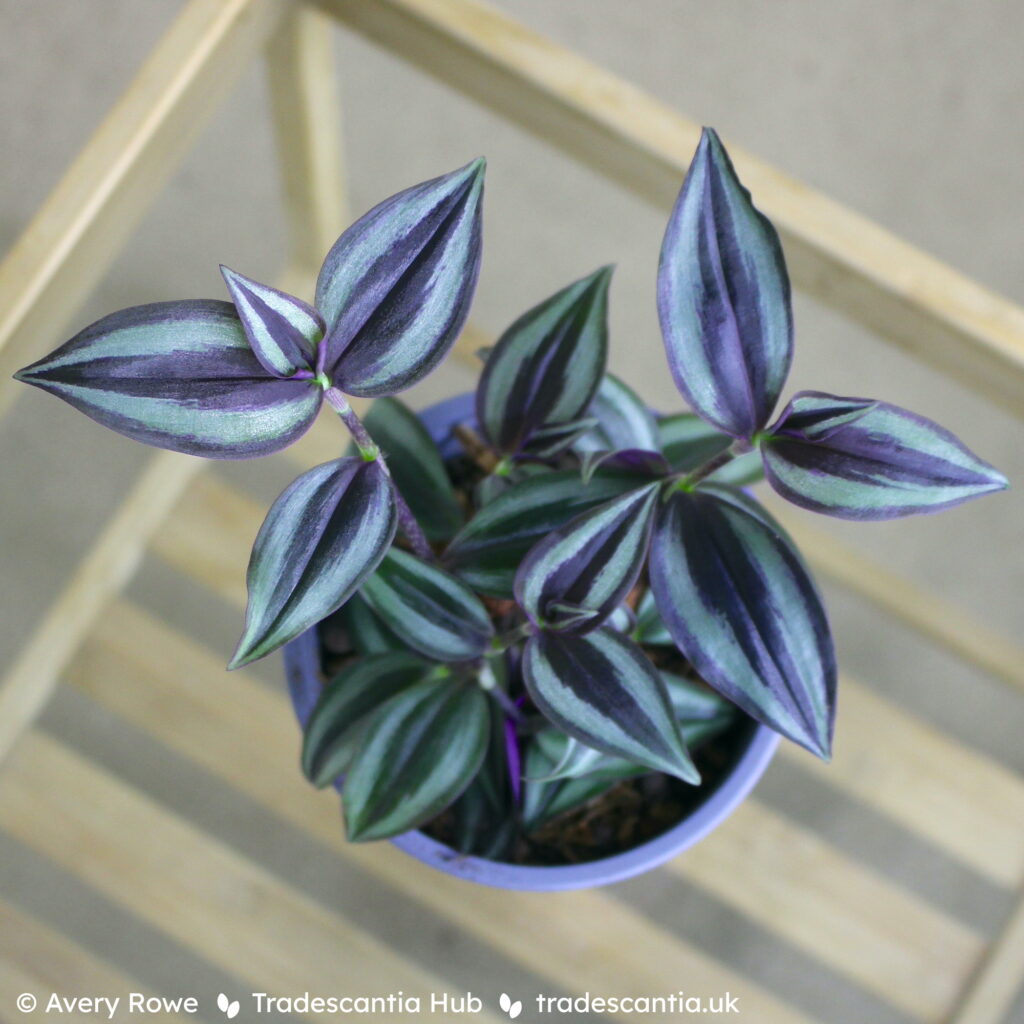
This section is illustrated with photos of flowers and seeds mostly from T. zebrina ‘Burgundy’ (with a couple of other cultivars individually identified).
I’ve successfully grown seeds from several different tropical species. There are various differences between them in plant structure, fertility, and germination – which I’ll mention as I go along where relevant. But the important anatomy and the basic process is the same for each species. So this guide should pretty much apply to any species in the genus.
Flower development
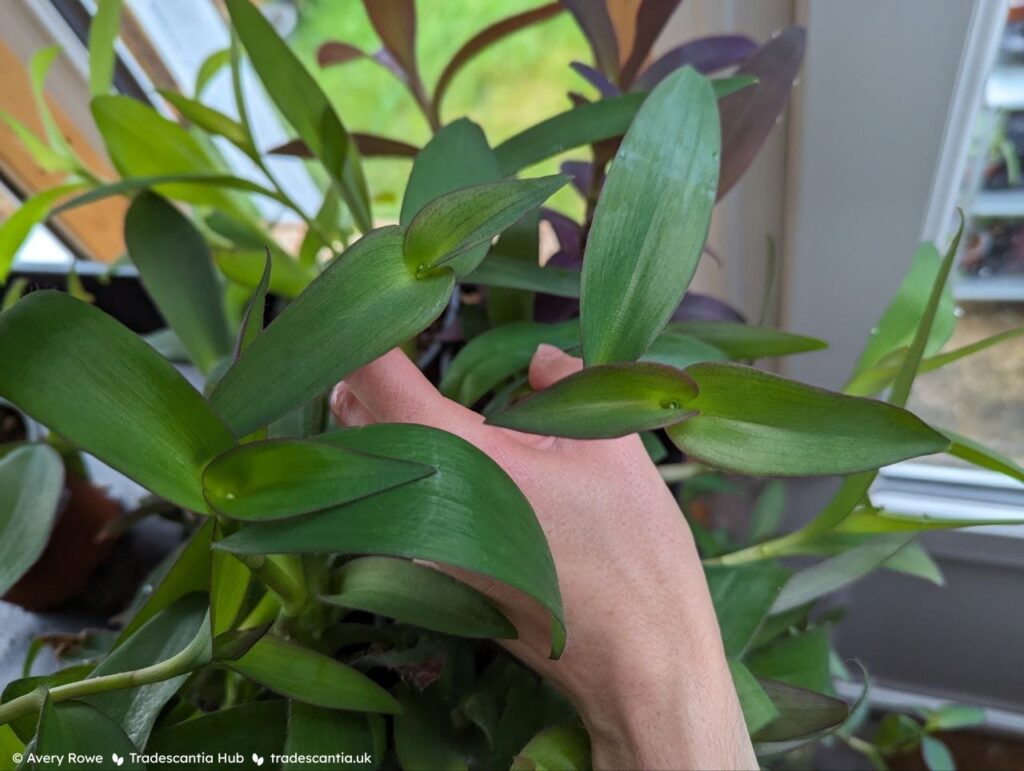
The sprawling tradescantias generally start out with terminal inflorescences – a flower stalk develops at the end of a stem. At first it looks almost the same as the normal vegetative growth, but with some subtle differences.
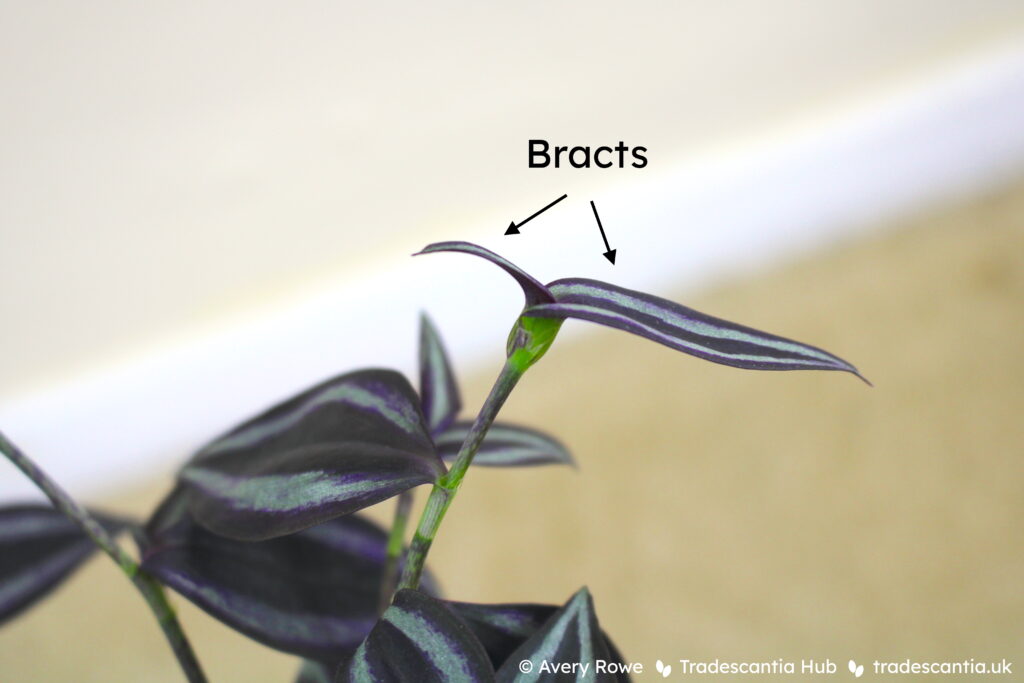
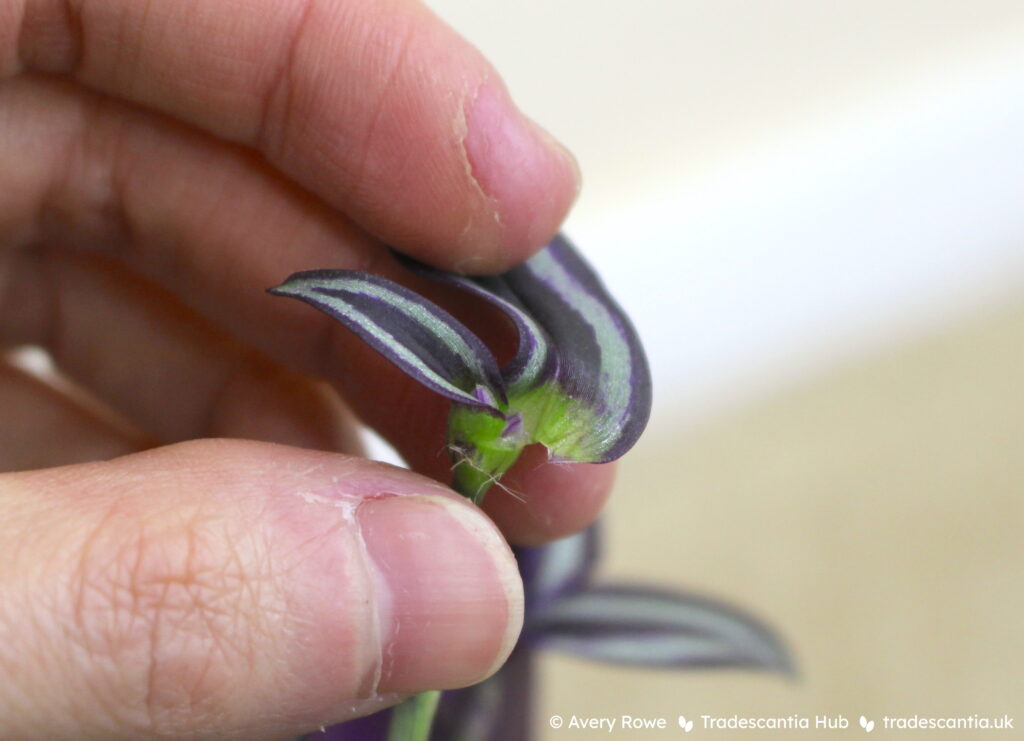
Instead of alternating leaves on each side of the stem, the inflorescence ends with a pair of bracts (special leaves) growing at the same spot. Those bracts are usually slightly smaller than the normal vegetative leaves, and one is slightly smaller than the other. They’re also folded lengthwise so that the two edges are close together, up above the central vein. This shape makes a little boat-like pocket on the top of the stem. The flower buds are inside that pocket, and when they open they stick out of the top.
T. spathacea flowers don’t form at the end of a stem, but instead on a tiny stalk off the side of the plant. The bract pocket is nestled down among the base of the main leaves, which can make it particularly difficult to get at.

When I want to get seeds, the first thing I do is remove those two bracts from the flower stalk. The buds are nestled in between them, so getting rid of the leaves makes it much easier to see and access everything. It’s not entirely necessary, but I recommend it for convenience. Just gently tear the leaves away at the base, the outer (larger) one first, and then the inner one.
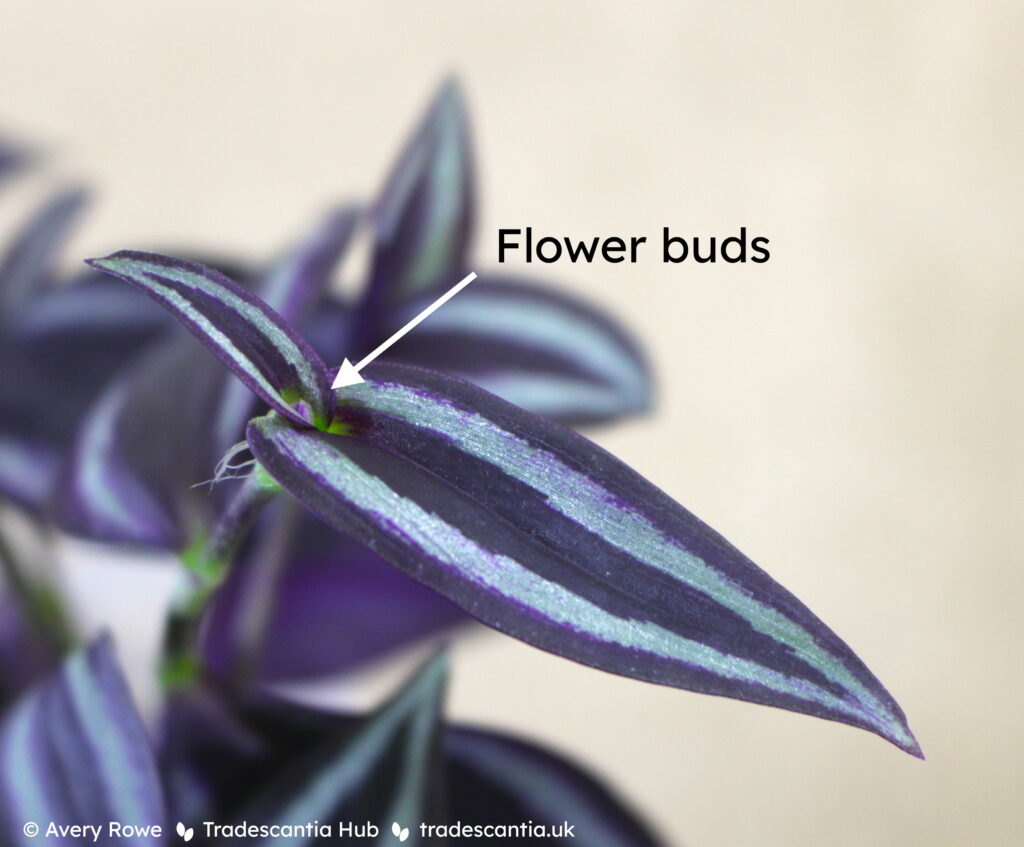
You’ll be left with a little naked stalk, tipped with a cluster of buds – the future flowers.
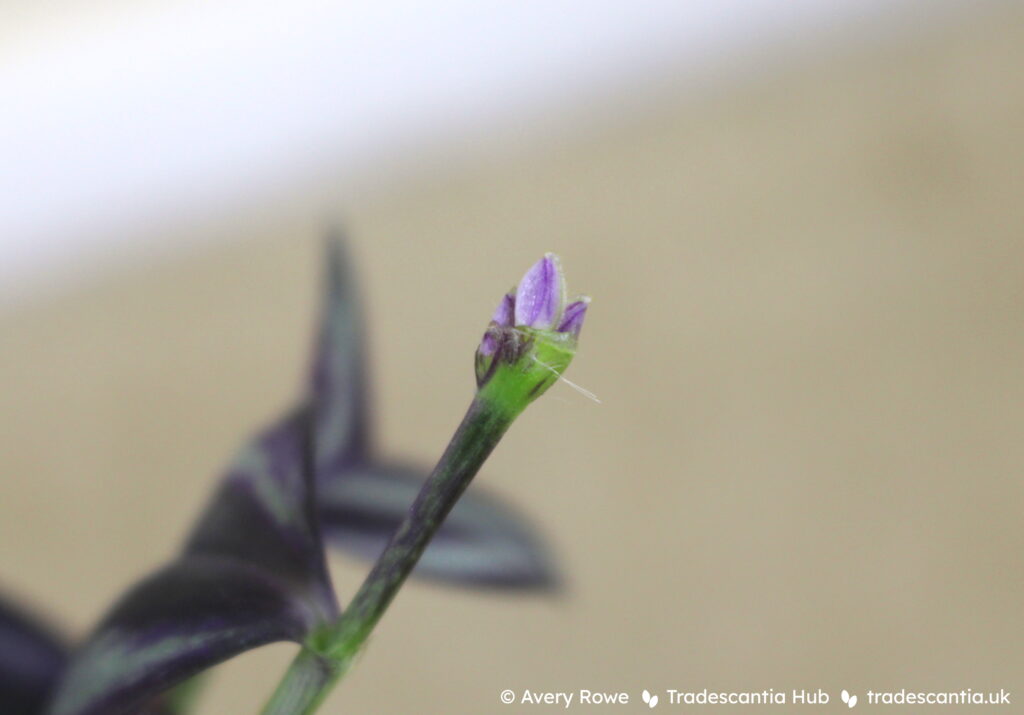
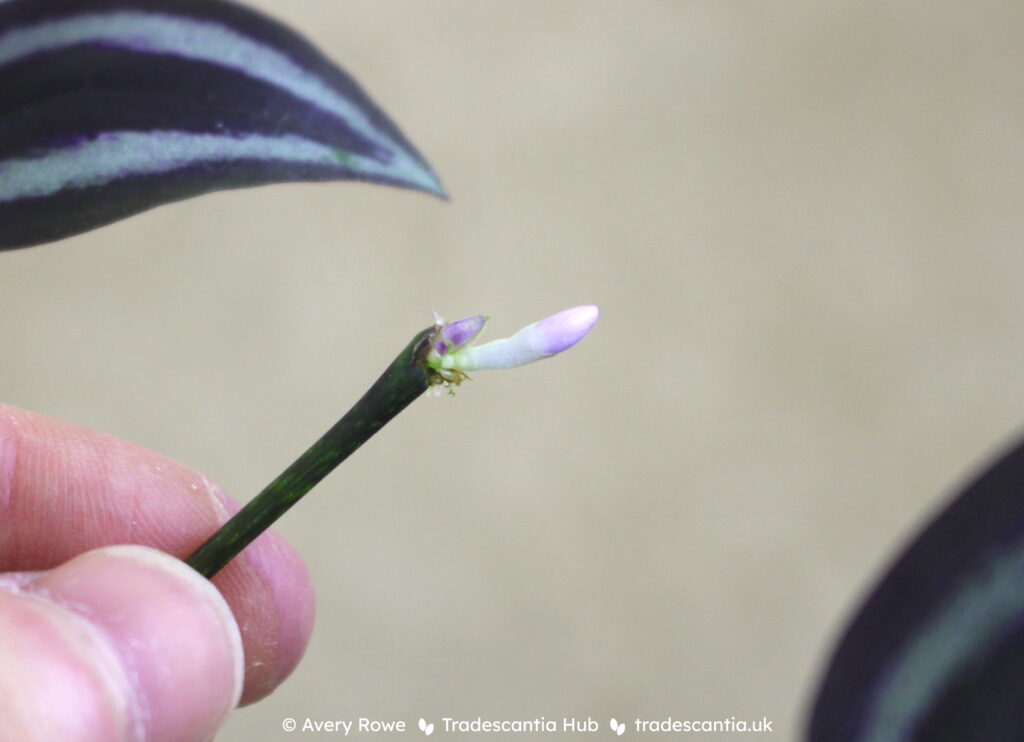
Each flower only opens for a few hours or a day at most – that’s why the Commelinaceae family are also called dayflowers! Flowers almost always open during the day, but I’ve found the time can range randomly from early morning to mid-afternoon. When a bud is about to open, it will suddenly elongate. This one stretched-out bud is showing that it will open within the next day.
Compatibility
The difficulty of pollinating a particular plant is dependent on whether the species is self-fertile (can pollinate itself) or self-sterile (cannot pollinate itself). The Tradescantia genus has a mix of both – here’s a summary of the tropical and houseplant species that I have been able to find information on (Moriuchi, 2006; Owens, 1981):
| Self-fertile (can pollinate itself) | Self-sterile (cannot pollinate itself) |
|---|---|
| T. cerinthoides | T. brevifolia |
| T. fluminensis | T. zanonia |
| T. spathacea | T. pallida |
| T. crassula | T. sillamontana |
| T. hirta | |
| T. zebrina |
If the species is self-fertile, it’s easy. The plant can pollinate itself, even from a single flower. You don’t need to worry about whether anything else is flowering at the same time. The downside is that it can be hard to prevent a self-fertile plant from pollinating itself, even if you do want to cross it with something else.
If the species is self-sterile, the requirements are more difficult. In a self-sterile species, one plant can’t successfully pollinate itself – it can only produce seeds if its flowers are fertilised with pollen from a different plant. A “different plant” in this case means genetically distinct. Since plants within cultivars are usually genetic clones, that means a different cultivar.
To cross different cultivars, they also need to be closely related enough to be compatible with each other. Plants of the same species are always reproductively compatible, by definition. So the best chance at a viable cross is between different cultivars of the same species. But plants of different species can also be compatible, and create species hybrid seedlings. There are various hybrids within the Tradescantia genus, including one I bred myself – T. brevifolia × hirta ‘Raspberry Ruffle’.
In general, the more closely-related two species are, the more likely they are to be able to hybridise successfully. All the known Tradescantia hybrids so far have been between species of the same subgenus. In other plants, it’s common for many species in the same genus to be compatible. And it’s very rare, but not unheard of, for plants of different genera to succesfully hybridise.
If a particular hybrid has already been created before, then you can be sure that it’s possible. But other than that, there’s no guaranteed way to tell whether any two different species will be compatible. The only way to find out is to try it and see!
Pollination
Once your intended flowers are open, it’s time for actual pollination. Each open flower has both anthers (which produce pollen) and a pistil (which collects pollen). The anthers are six little stalks with dusty blobs on the ends – often with long wispy hairs coming from the base of the stalk. The pistil is a single hairless stalk with a blunt or slightly widened end. The colours of all parts vary in different cultivars, so they are sometimes easier or harder to distinguish.

To fertilise, pollen needs to be transferred from the anthers to the pistil. For a self-sterile species it needs to be from the anthers of one plant to the pistil of another.
The anthers don’t release pollen immediately when they open, sometimes it’s not for a few hours. The pollen itself is visible white or yellow dust which will sprinkle onto the flower petals and transfer onto your finger if you touch the inside of the flower. So if you don’t see that dust, there’s nothing to pollinate with yet – check again in an hour or two.
Occasionally a flower will never release its pollen, and will die off without ever being able to pollinate anything. Some plants seem to be more prone to doing this – particularly the Continental Group (that could be because they’re hybrids, which tend to be less fertile). But sometimes pollen release will fail even on usually-fertile plants for no apparent reason.
A flower can still be fertilised with other pollen, even if it hasn’t released its own pollen.
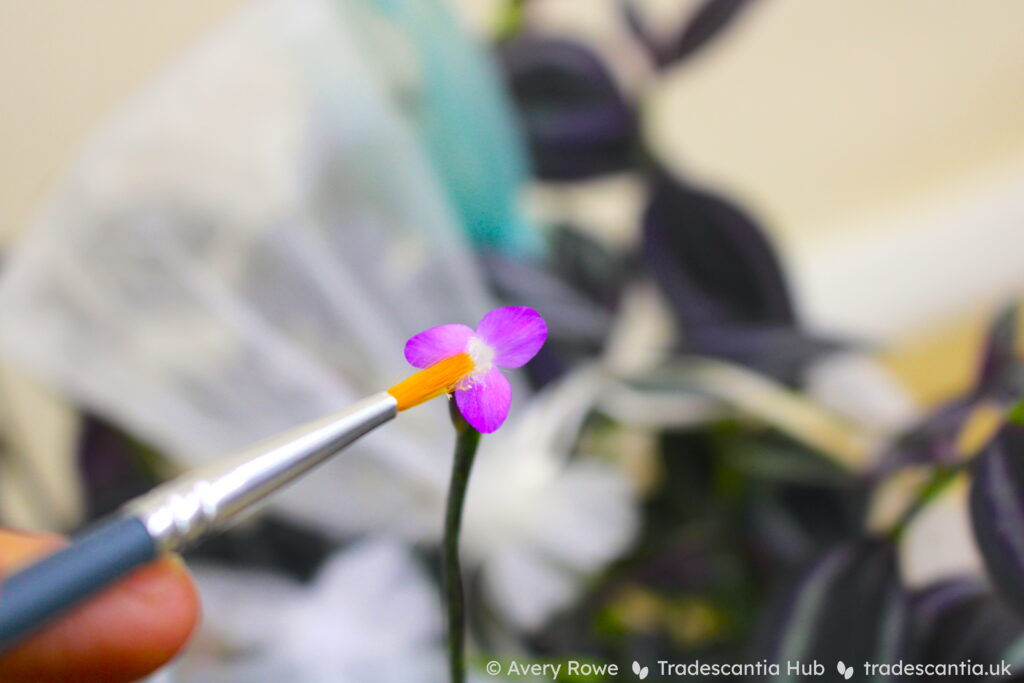
There are lots of possible ways to transfer the pollen. If you aren’t interested in keeping track of the exact parentage – or you only have two plants in flower – you can be quite approximate. Brush the inside of each open flower with a paintbrush or a fingertip for a few seconds to touch all the little stalks inside, then go back and forth doing the same thing to all the flowers you want to fertilise. If it’s convenient, you can even brush the open flowers directly against each other without using anything else.
If you want to control exactly which flowers are pollinated by which parents, you’ll need to be more careful. I use cotton buds (swabs) to carefully collect pollen from the anthers of one flower, and transfer it to the stigma (the end of the pistil) of another flower. I use a clean cotton bud with every transfer, to avoid accidentally bringing back pollen from a different plant when collecting more. Then I use thread to tie a tag around the individual flower, labelled with the pollen parent. That way I can track the parentage all the way through to germinating the seedlings.
Here’s a video I posted on instagram of my process for pollinating flowers:
Seed development
By the end of the day – whether fertilised or not – the petals will wither into a little blob at the end of the flower stalk. (Side note: if you touch this blob within the first day or two after the flower dies, your fingers will be stained by a sticky liquid the colour of the petals!)

It will take a few days to tell whether the flower has been successfully fertilised. If it hasn’t, then the entire base of the flower will soon dry up and eventually drop off.

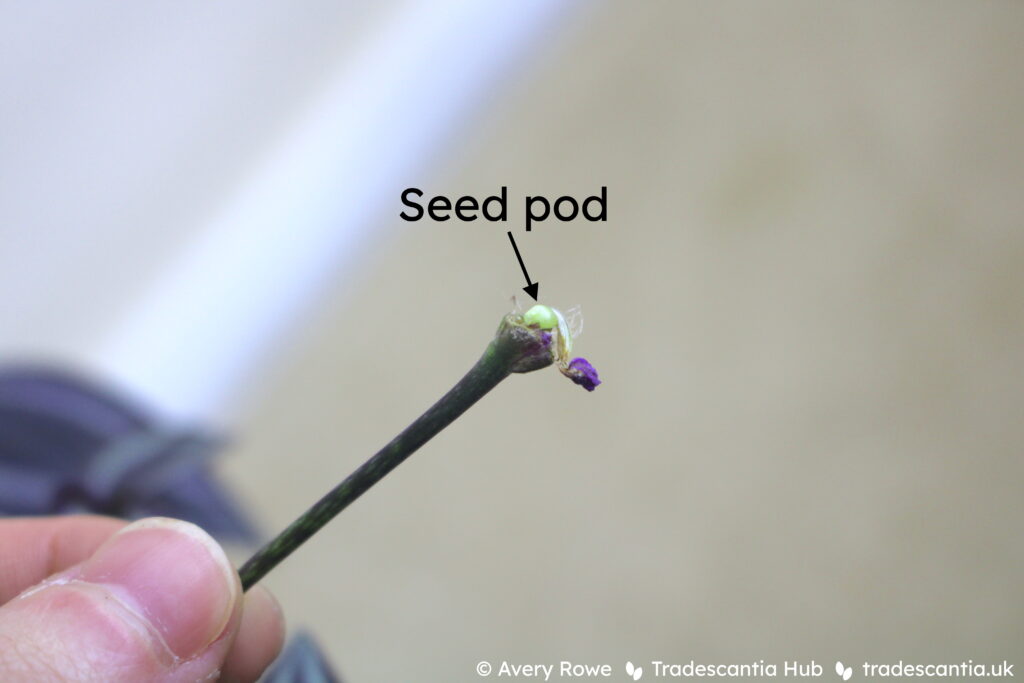
If it has been fertilised, the base of the flower will stay looking fresh and alive, but it will curl downwards. Gradually, a round green swelling will start to appear at the base – the developing seed pod.
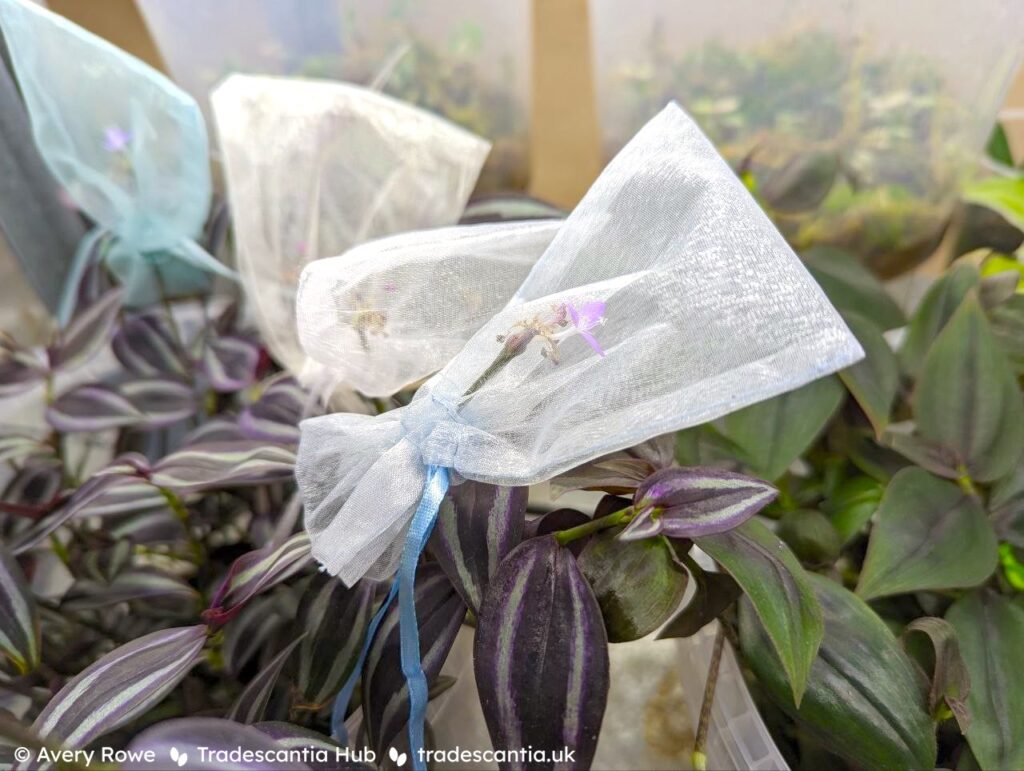
It’s now a waiting game for the seeds to ripen, which generally takes a month or two. When the seeds are fully ripe, the skin of the pod will dry out and then split, scattering the tiny seeds. So you’ll need something to catch them – I use clear mesh bags which make it easy to look through and see whether the pods have opened yet.
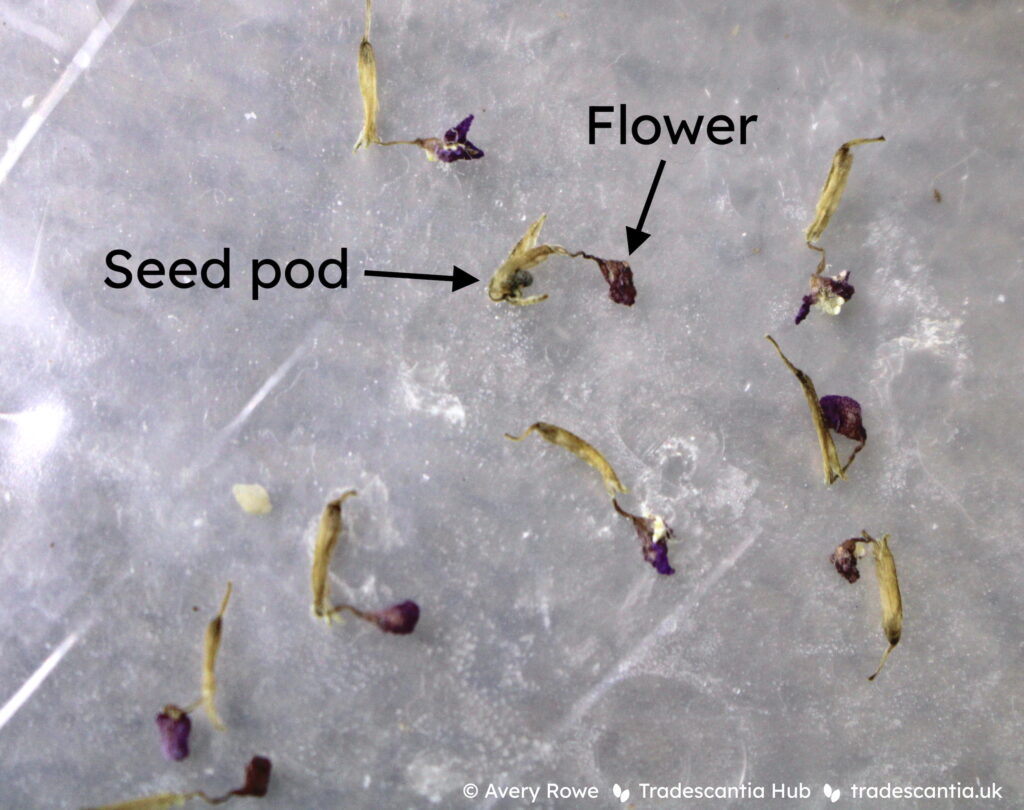
Each pod generally holds between one and four seeds. Once they open, carefully remove the bag from the top – holding the stem over a dish to catch anything that falls – and tip out all the loose material. The dried flowers will often come off at the same time, so it can take a bit of searching to pick out the seeds themselves.
Sometimes the seeds will actually still be stuck in the remains of the pod connected to the flower – a gentle poke will release them.
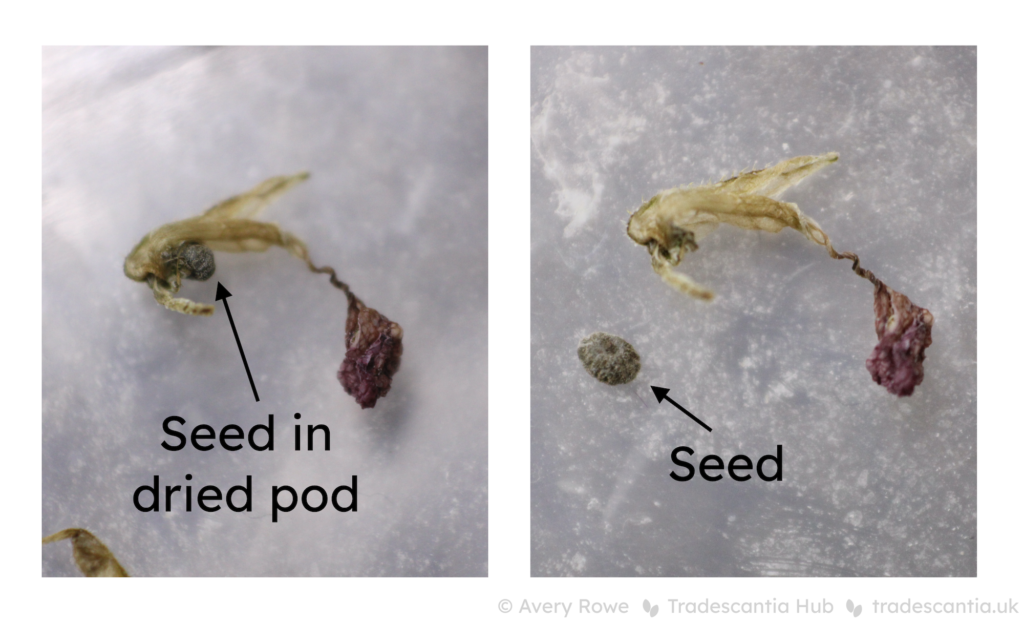
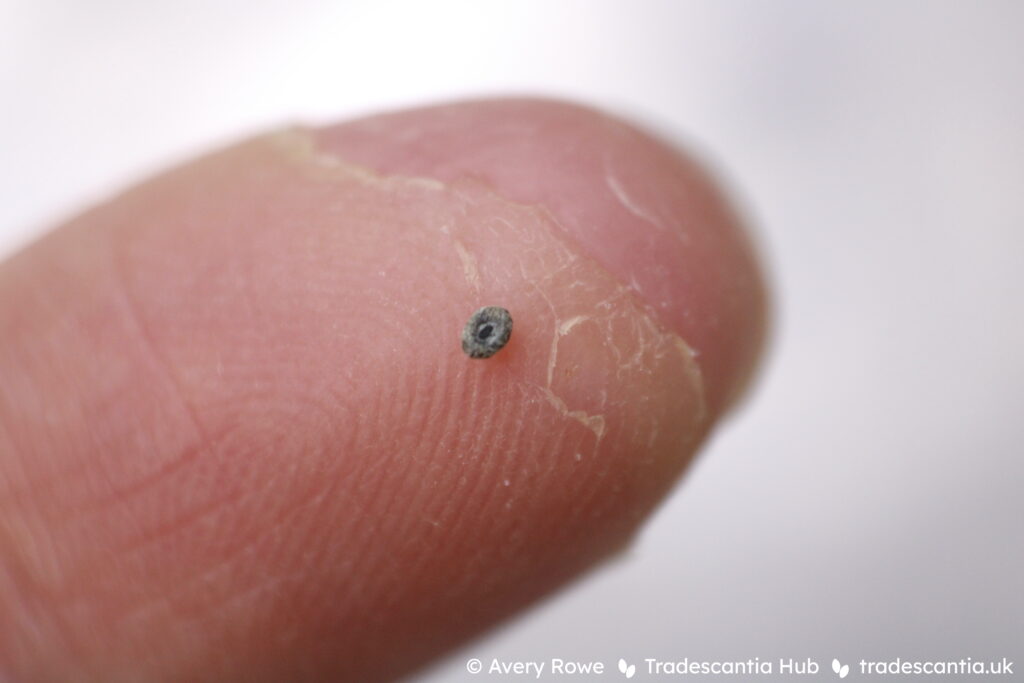
The seeds themselves are slightly-flattened ovals, with a little bellybutton-like dip on one side. They’re usually greyish when fully dry, but might be shiny and black if they’re still moist from the pod. Occasionally a seed is very pale brown rather than the usual colour, and these seem to be just as viable. T. zebrina seeds are about 1mm long, whereas T. pallida and T. spathacea seeds can be 3-4mm.
Germination and planting
I put the fresh seeds into an airtight container (a ziplock bag or covered saucer) with damp cotton wool, and put it on a heat mat for warmth. This method lets me monitor the seeds constantly so I can see as soon as any starts to germinate or rot. I’d estimate that about half the seeds I’ve tried to germinate actually succeeded, so this method also saves me wasting space and effort on potting up every seed individually straight away.
Here’s another instagram video showing the process of seed collecting and setting up for germination:
The very quickest I’ve had seeds germinate is less than a week for T. spathacea. T. pallida is a bit longer, generally a month or two. The longest so far is about five months for T. zebrina.
I’ve noticed that the freshness of seeds seems to have a major impact on viability. In spring 2024 I tried planting some seeds that I collected in summer 2023, and not a single one germinated. So now I always set them up in moist cotton wool immediately, the day I collect them – and I try to collect them as soon as possible after the pod splits open.
So it’s another waiting game – this one potentially even more tedious than the last. Check on them every few days, and hopefully, eventually, there will be signs of life.

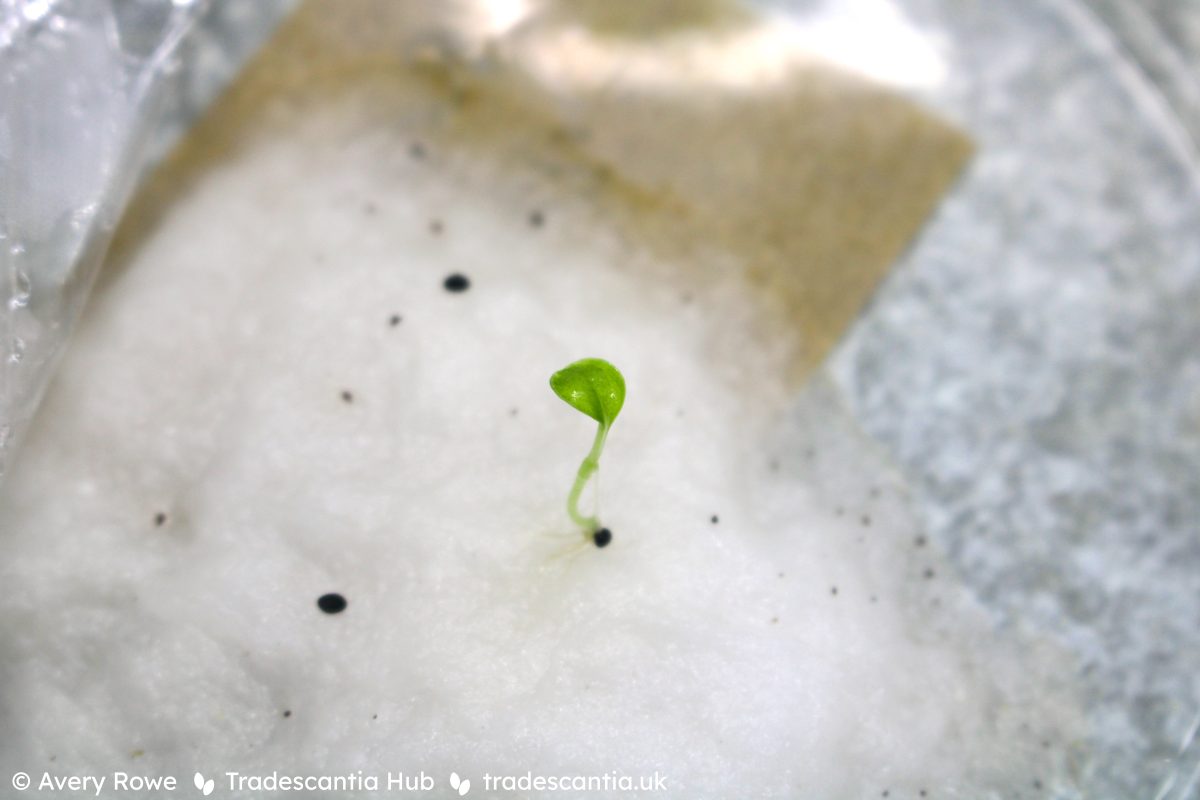
The new seedling can be moved into your preferred growing medium (I use sphagnum moss). Carefully lift the seedling away from the cotton wool – tweezers can help to avoid damaging the roots. Then bury the bottom in a small container of growing medium so that the first leaf is just above the surface, and water it (carefully so as not to knock the seedling around!).
I initially had trouble with T. zebrina seedlings being extremely weak and failing to develop. Out of my first batch of three seedlings, two of them stopped growing when they had just a couple of tiny leaves, remained in stasis for months, and then abruptly melted.
But with some more experimenting, I’ve found the single most important factor for success is light. Give the seedlings absolutely the brightest, most scorching light you can. Direct sun on a south-facing summer windowsil is great. If that’s not available, then intense artificial light will do. I position mine so they’re within less than 10cm of the LED lights (which I usually keep about 30cm away from adult plants!).
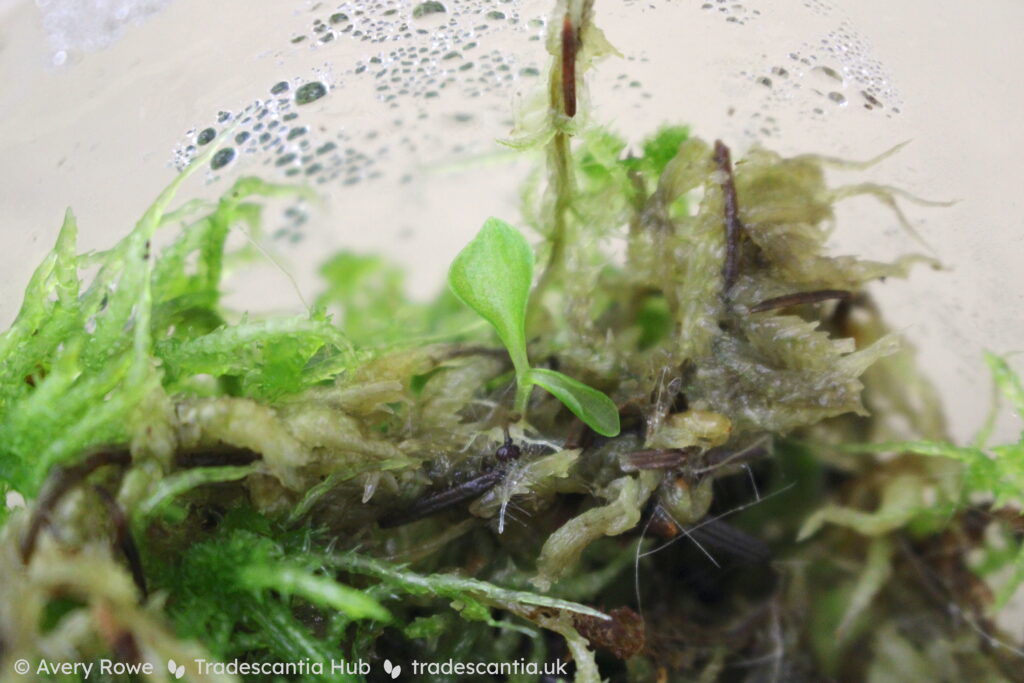
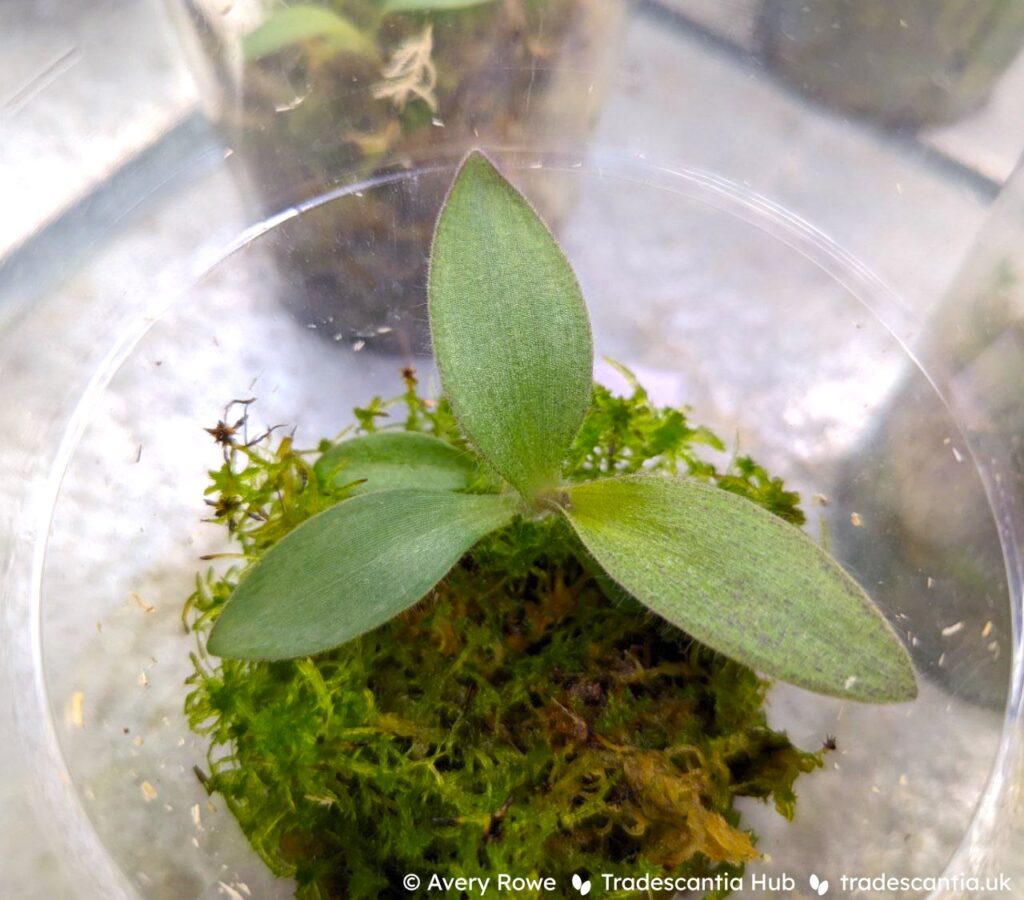
Good light improves the survival rate, but zebrina seedlings are still slow growers at first. It took five months for my first seedling to get to this point:
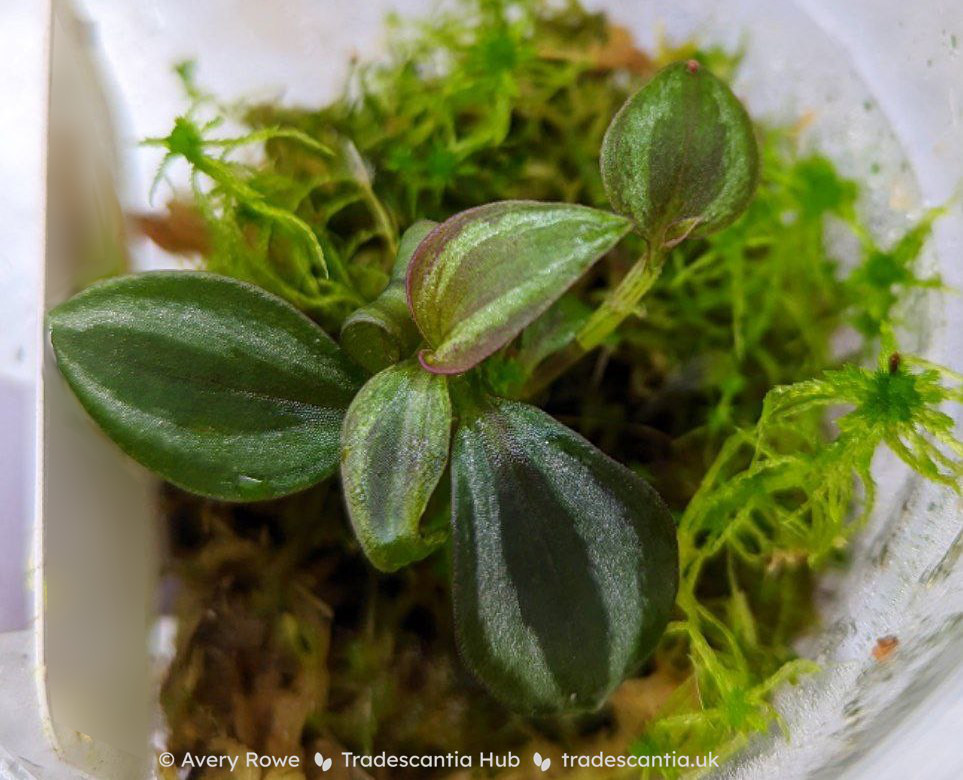
But once they take off, they soon catch up to the speed of most zebrinas. This is the same surviving seedling just three months later:
T. pallida seedlings are generally much faster and more vigorous – I didn’t lose a single one out of 50+ in my first year growing them.
And some of them started to flower at less than a year old.
Conclusions
There’s no getting around it: getting and growing seeds from houseplant tradescantias is difficult, slow, disheartening, and inefficient. You can’t predict whether it will work at all, and even if it does work the chances of getting a good or interesting result are slim. I don’t think there’s any point trying to pretend that it’s easy – because I think anyone who really does want to grow seeds won’t be put off by difficulty!
It’s not an efficient way to get new plants. But it’s an interesting way to learn about the plants you have. And the process is satisfying in part because of how labrious it is. Plus there’s always the chance that you’ll end up getting a brand new and remarkable plant.
Found this article useful?
If you want more great resources like this, you can help me keep making them with a regular payment on Patreon.
References
Moriuchi, J. B. (2006). A Comparison of Invasive and Noninvasive
Commelinaceae in a Phylogentic Context. [Doctoral dissertation, Florida State University]. Florisa State University Digital Library. https://diginole.lib.fsu.edu/islandora/object/fsu:180484/datastream/PDF/view.
Owens, S. J. (1981). Self-incompatibility in the Commelinaceae. Annals of Botany, 47(5), 567-581. https://doi.org/10.1093/oxfordjournals.aob.a086054.
2 replies on “Growing tropical tradescantias from seed”
Amazing article. Thank you for publishing.
Thank you so much for such detailed explanation and information. Such an amazing text!