
I’ve posted bits and pieces about my own growing methods on social media, but I’ve never written a detailed article as a reference. When I mention growing tradescantias in moss, people are often surprised and curious. So I’m finally writing it all up with pictures, to explain what I do and why.
In this article I’ll be writing about how I grow my indoor tradescantias with hydroponics (or semi-hydroponics, depending on your definitions). There’s another article about the plants I grow in typical potting mix under glass and outside.
Environmental conditions
The indoor plants have a spare bedroom all to themselves, filled with metal shelves. Each shelf has an LED strip underneath it to light the shelf below, which are on for 12 hours a day. Although it looks bright in pictures, the artificial lighting is fairly low by plant standards. It keeps them alive and healthy, but their growth is slower and less robust than it would be in full sun.
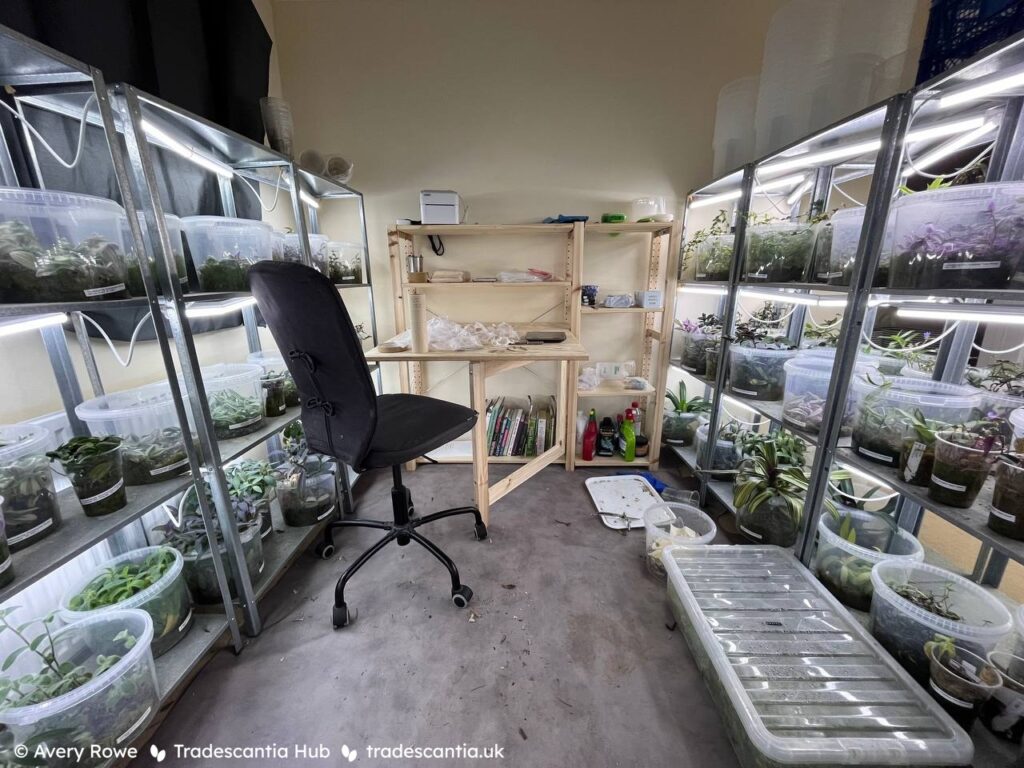
I don’t heat the plant room specifically. But airflow from the rest of the house, plus the warmth from the lights (not much individually, but 48 strips add up!), keeps it slightly above room temperature. It’s well-insulated so it’s very stable and generally stays in the range 20-25ºC all year, occasionally a little warmer in the hottest parts of summer.
I also don’t do anything to manage humidity in the room – living in a Welsh temperate rainforest does that for me! It usually ranges from 50-75% year-round, with occasional spikes and dips depending on the weather. I keep a window open during summer which lets in a little breeze, but there’s not usually much airflow around the room.
Containers
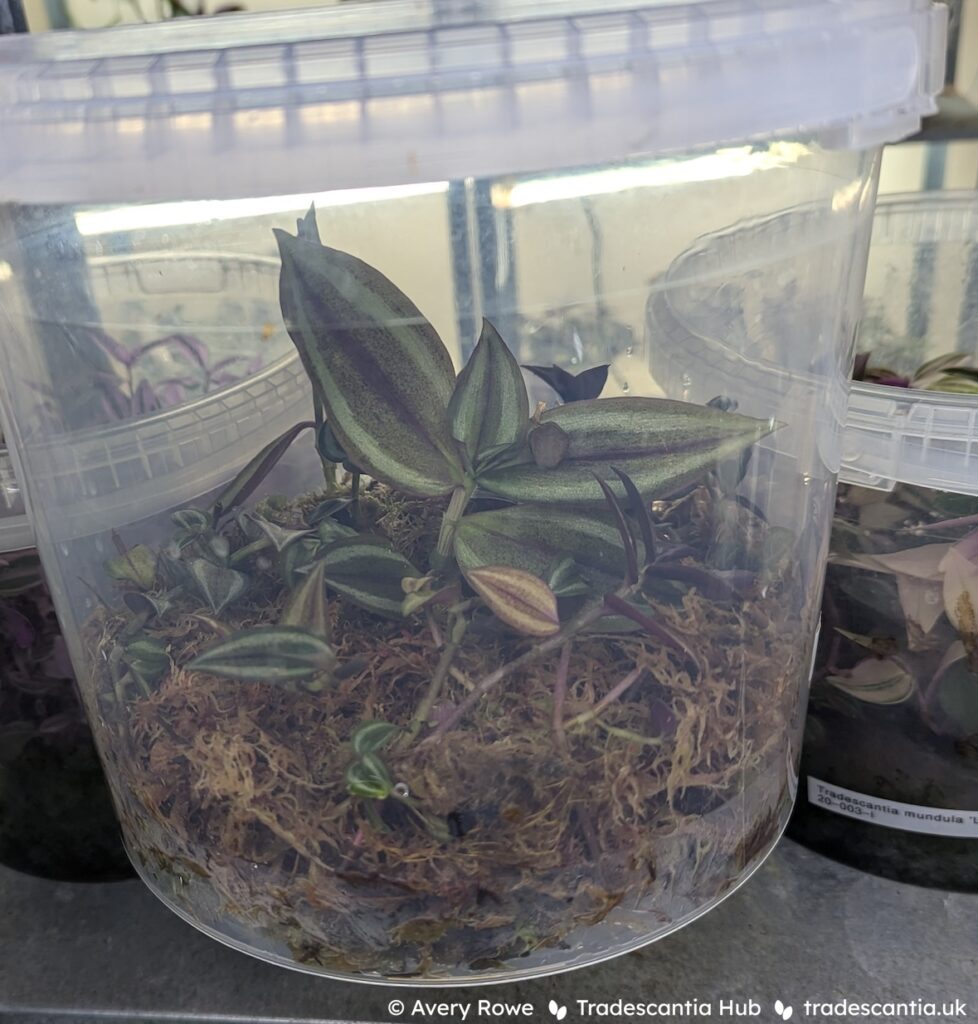
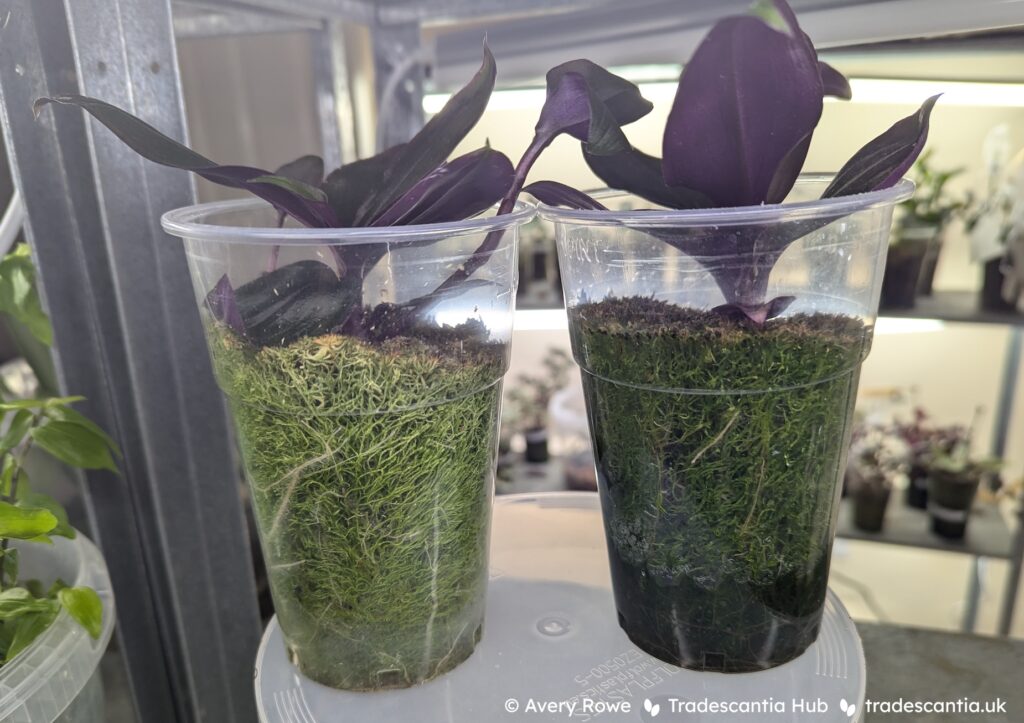
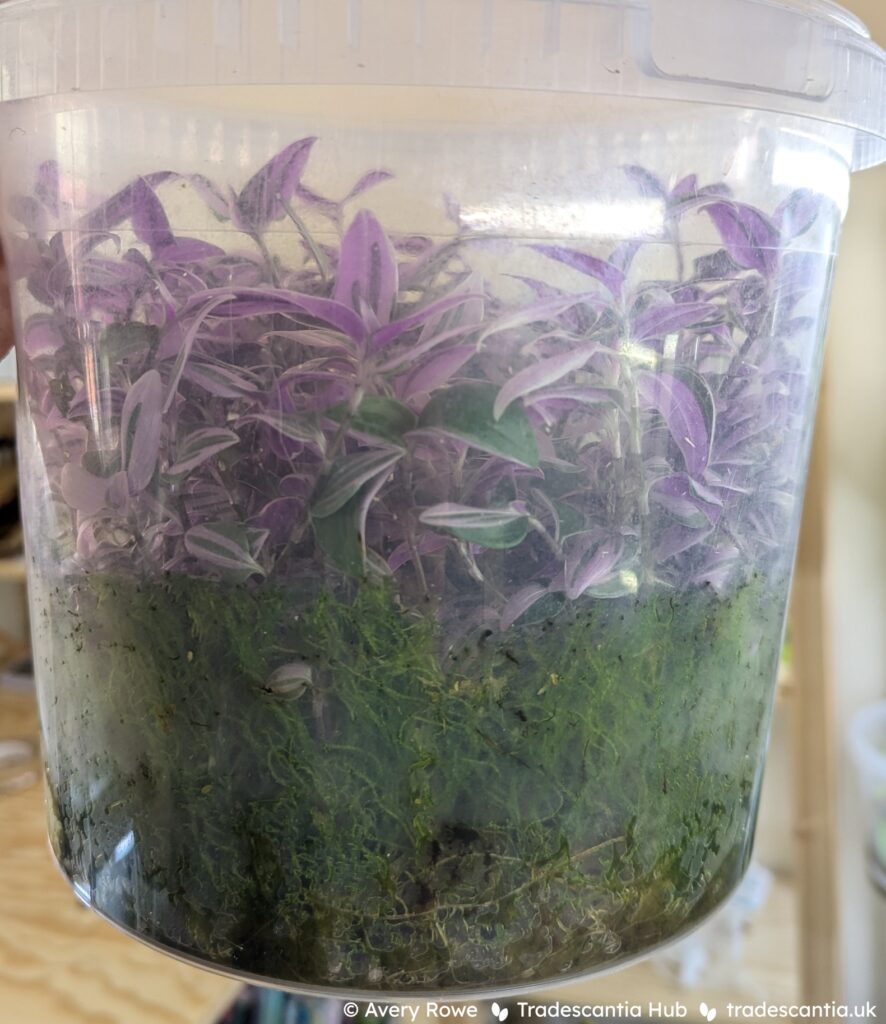
I keep the main stock plants in 5-litre clear plastic buckets, and seedlings or new cuttings in 0.5-litre cups. Using clear containers makes it easy to monitor the substrate and water levels (more on those later). It also means the plants get as much light as possible all the way down to the bottom.
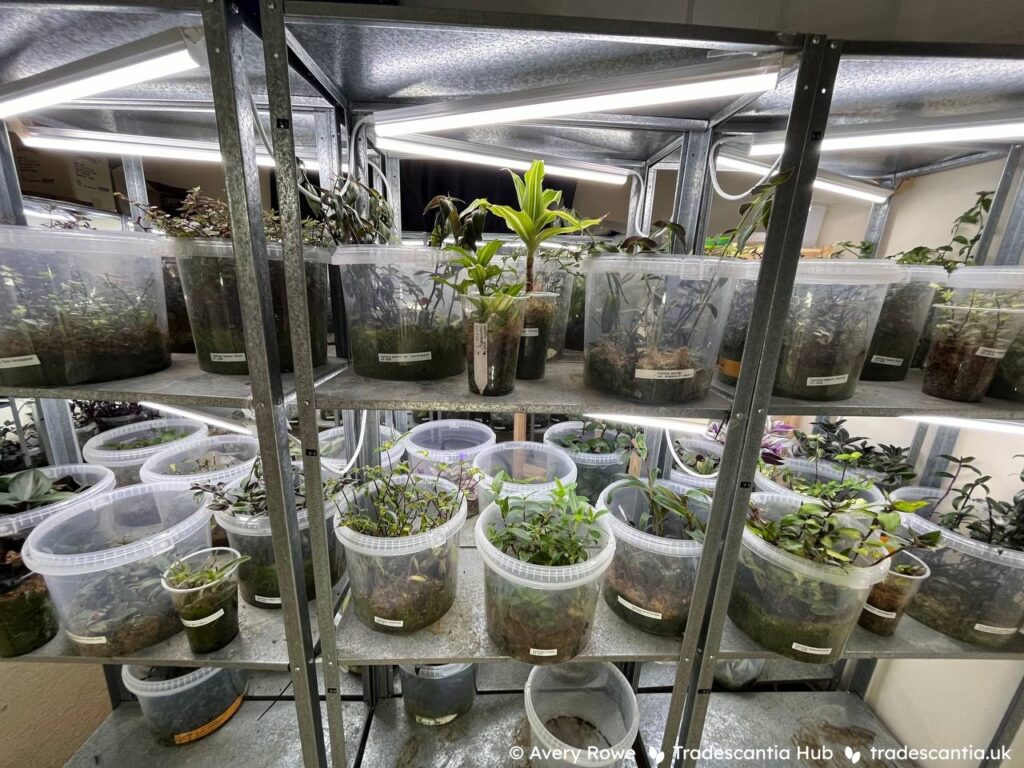
The buckets are about 18cm tall, but only filled with about 5-10cm of substrate (more on that in the next section). The containers are watertight, with no drainage holes in the bottom. I use deep containers rather than shallow trays for two reasons:
- They keep in the humidity. This makes the substrate dry out slower so I don’t have to water so frequently. And it also helps make sure that even tiny and delicate cuttings can take root and grow well.
- The sides give the stems something to lean against so they don’t immediately trail over and start crawling into their neighbours’ pots. The deep containers help keep them separated for longer with less frequent pruning.
Growing in sphagnum
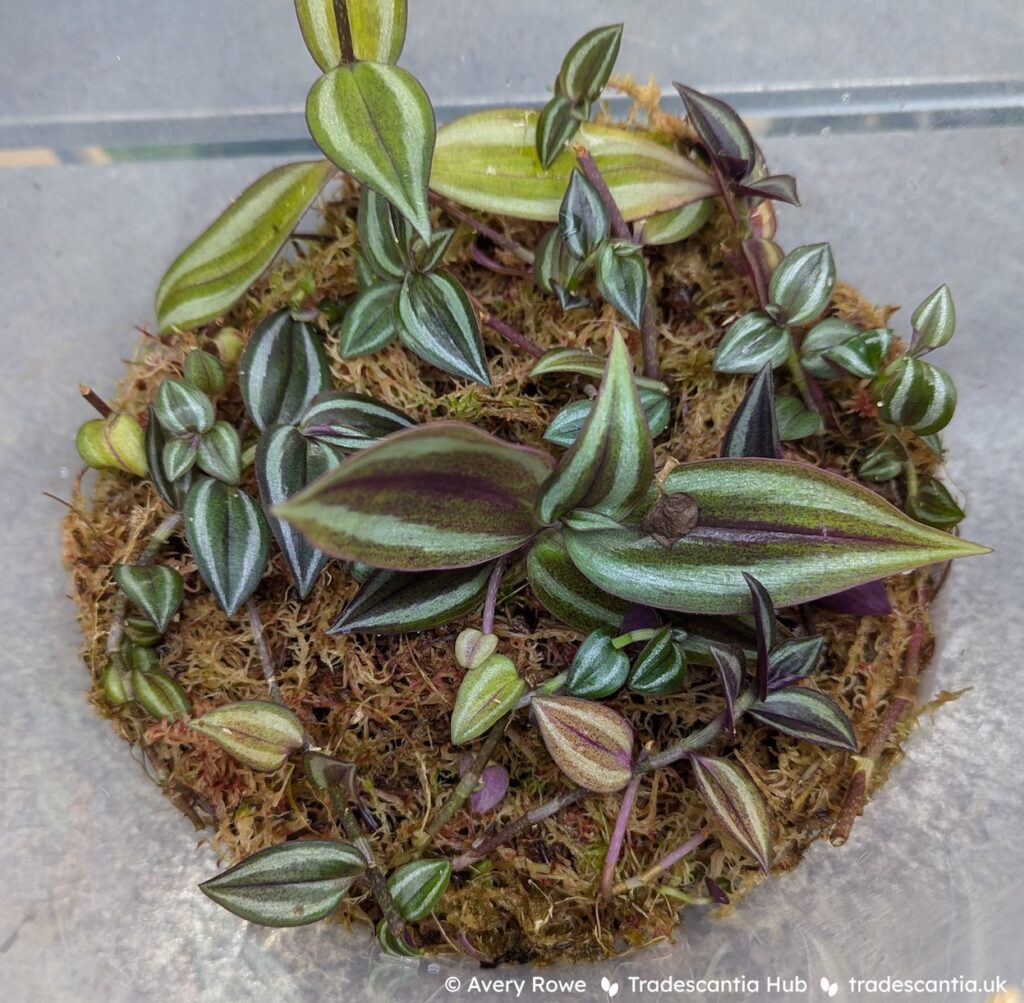
Instead of potting mix, I grow the plants in live sphagnum moss. When I pot up a container, I add a 5-10cm layer of fluffed-up, fresh strands. Then I lay cuttings on top or poke them in vertically, and they grow roots throughout the moss.
It might seem strange that I grow in sphagnum moss – a medium renowned for its water retention – when I’m always telling anyone who will listen that tradescantias are succulents. And it’s true, they are succulents! But they’re a bit unusual in that they’re much more adaptable than most other succulents.
Tradescantias can take on extremely succulent growth habits in challenging environments with bright light and extreme temperatures. But when they’re somewhere with lower light and very moderate weather – like indoors – they won’t become so succulent. Their stems and leaves are thinner and store less water, and their growth is more delicate.
They store less water, but they still keep their tendency to rot easily in excess moisture. So that means that keeping them happy and healthy when they’re in their less-succulent habit indoors can be a tricky balancing act. I’ve found sphagnum moss to be the perfect solution to that balance. It absorbs huge amounts of water which is easily accessible to the plant, but it’s also very light and keeps plenty of air around the roots.
It makes sense that they do well in sphagnum, because it mimics the natural habitat of many species. The wild equivalent of a warm shady house is a warm shady rainforest floor, where tradescantias scramble through the leaf litter with their shallow roots rarely reaching down into the actual soil. That shallow layer of light, fluffy, moist leaf litter is very similar to a shallow container of sphagnum.
One of the biggest reasons I tried out hydroponic growing in the first place was actually fungus gnats. When I was still using regular potting mix indoors, my whole house was constantly full of clouds of gnats no matter what I did. But with almost no compost or decaying organic matter in the sphagnum moss, there’s hardly anything for them to eat, and so their population stays very low. Now I might see one or two a day – which I think is pretty good when cohabiting with hundreds of plants!
Watering and nutrients
I water with collected rain as much as possible, to avoid buildup of limescale and other tap water minerals. I pour water into the bucket until there’s a 1-2cm reservoir of liquid at the bottom. The moss wicks that water up to the surface, so all the roots have access to moisture without being waterlogged. Then I let the reservoir dry out completely, which generally takes 1-3 weeks. Once there’s no pool of water left at the bottom and the moss is starting to dry out on the surface, I water again.
Every month or two, I water with hydroponic fertiliser solution instead of plain water. A hydroponic fertiliser is one that contains all of the elements that plants need, including the micronutrients (which are only needed in very small amounts). Fertilisers that are intended for soil growing generally only contain the “big three” macronutrients – nitrogen, phosphorous, and potassium – because the other elements are already present in the soil.
Because there’s no buffer of nutrients already in the moss (like there is in soil), the plants start to show deficiencies very quickly if I forget to fertilise for a bit too long. But they also recover quickly when I do finally feed them again.
Long-term maintenance
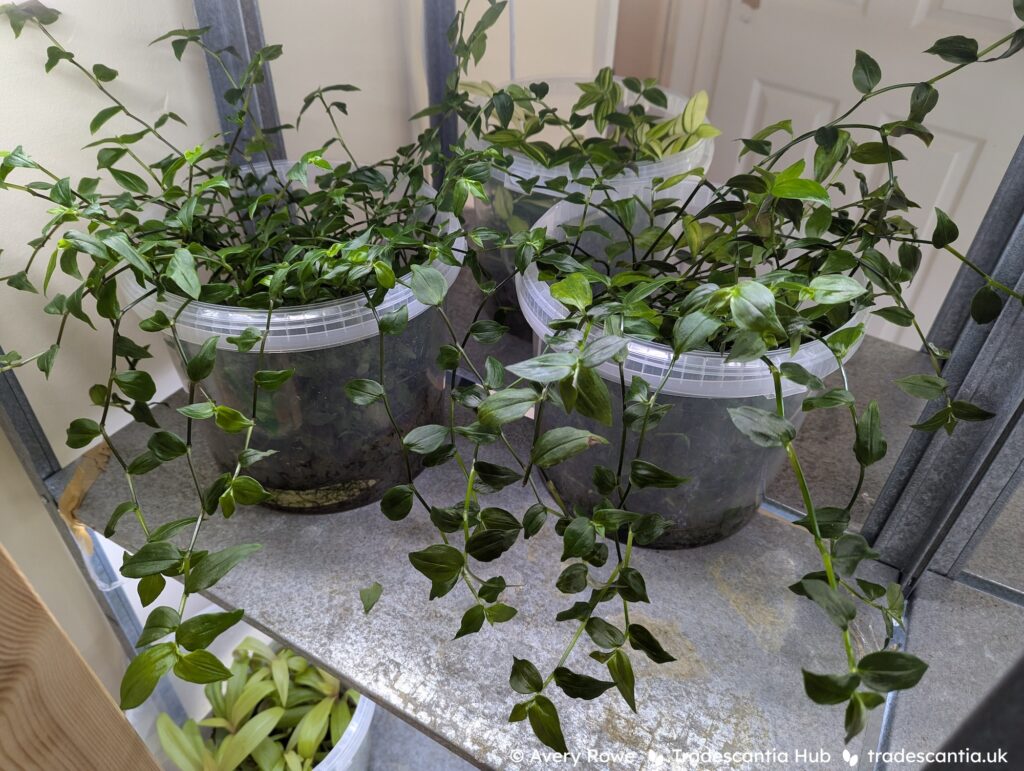
Although the deep pots help keep the plants separated, they do eventually start to climb out and sprawl over the edges. I prune long stems regularly and stick them straight back into the moss, which works for a good while. But after a lot of this, the old lower stems start to form a mat over the top of the moss and it becomes difficult to prune and propagate cuttings any more.
The moss itself behaves quite unpredictably over time. Sometimes it dies very quickly, and becomes inert. Sphagnum is resistant to decay, but eventually it starts to decompose and becomes denser and less airy (as well as harbouring fungus gnats). Other times, the moss stays alive and grows actively. This is great when it can keep up with the lower plant stems and keep providing a new level for them to root into. Although with slower-growing compact plants like the Continental Group, the moss sometimes starts to overtake them, which can be a problem!
Rainwater is very low in minerals, but I do sometimes have to use tap water. And fertiliser contains minerals by design. Without drainage holes or any way to flush water through the container, all of those minerals build up in the substrate over time. The effects aren’t very tangible, but I know that eventually the plants will start suffering from subtle nutrient imbalances because of it.
For all of those reasons, I repot the plants about once a year.
- I cut all the healthy growing tips and set them aside to propagate.
- I pull out all the leafless lower stems and get rid of them.
- If the moss is still alive, then I separate and clean it to reuse. Otherwise I discard all that too and start fresh.
- I layer 5-10cm of clean moss in the bottom.
- I stick the good cuttings in or drop them on top, and they keep growing as if nothing happened.
Conclusions
I hope this has been an interesting guide to how I grow my indoor tradescantias. I don’t necessarily recommend this method for everyone. I think growing in ordinary pots of ordinary potting mix is simpler and easier for most people, and it can clearly work just fine.
But this hydroponic method works great for me. It keeps down fungus gnats, keeps the plants healthy and under control, and doesn’t take any more time or effort to maintain. If you’re struggling to keep your indoor plants healthy or overwhelmed by fungus gnats, and you’re willing to learn some adaptations to your usual care routines, then hydroponics might be worth a try!
3 replies on “How I grow my indoor tradescantias hydroponically”
Thank you. I’ve been thinking about switching from soil to sphagnum, so you article had my full attention.
Brilliant article thank you. I’ve been frustrated that my props are so healthy whilst in water but se to become crispy and less vibrant once in soil. Definitely going to try this for my latest props. Any tips on finding the plastic containers?
These ones I use are sold as food packaging – I bought them in bulk from a commercial supplier so I don’t have any ideas about getting them in smaller quantities!